Introduction:
To Build Chimney in a house is an essential construction endeavor that involves interaction between use, safety, and appearance. The construction of a new chimney provides proper ventilation, increases energy efficiency, and contributes to the house’s aesthetic appeal. The following guide can enable you to build a chimney that will last long and be safe from extreme weather or fire risks.
Step 1: Planning and Design
There are conditions of the chimney’s design and location that should be considered before construction begins. Consider the following:
Purpose of the chimney:
Is it for a fireplace, stove, or Furnace? This defines the dimension as well as the nature of the chimney.
Building codes:
Study the building codes in most regions and make the necessary approvals. The implementation of following regulations remains simple but guarantees safety and excludes legal complications.
Chimney type:
Determine if your home fits best with a masonry or prefabricated metal chimney. While masonry chimneys are long-lasting and conventional, metal chimneys are more straightforward to construct.
Location:
The chimney should preferably be built in the middle part of the structure to favor draft and steadiness.
Step 2: Gather Materials and Tools
For a masonry chimney, you will need the following materials:
Bricks or concrete blocks
The mortar is prepared by mixing cement, sand, and water.
Fire-resistant flue liners
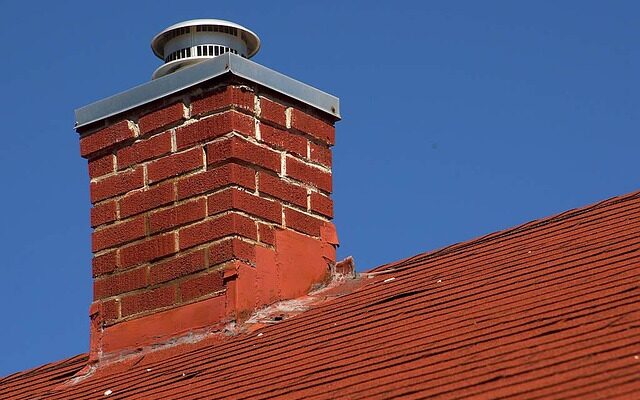
Flashing (which covers the joint that exists between the chimney and roof).
Chimney cap (to keep off debris and water ingress)
Reinforcement bar – if necessary
Equipment needed includes a trowel and level, measuring tape, a masonry saw, and a scaffold.
Step 3: Build the Foundation
The first component of the chimney is the most important since it supports the rest of the chimney. Follow these steps:
Excavate:
Bury at least 12 inches below the ground or the frost line to avoid some movements due to temperature changes.
Pour the concrete:
Enter high-strength concrete to achieve a suitable concrete base. It will then need to be allowed to cure for some days.
Check the level:
Make sure the ground on which the foundation is to be poured is level to avoid the formation of some structures.
Step 4: Construct the Chimney Stack
Once the foundation is ready, begin building the chimney stack:
Lay the bricks:
Always begin with the fundamentals and move up. Apply mortar between two bricks and make sure that it is appropriately leveled.
Install the flue liners:
Always ensure you install fire-resistant flue liners as you construct a chimney. These liners carry the smoke and gases vertically, shielding the masonry from heat and corrosion.
Add reinforcement:
When erecting the chimney, a tall chimney or chimney exposed to strong winds should be reinforced using steel reinforcement bars.

Step 5: Seal and Waterproof
To protect your chimney from weather damage:
Install flashing:
Install metal flashing on a chimney that joins the roof to avoid leakage.
Apply waterproofing sealant:
Apply a suitable masonry sealant while working on the chimney’s outer side. This minimizes water absorption and thus reduces the chances of cracks forming from the concrete floor slab.
Add a chimney cap:
Put a cap on the top of the chimney to discourage water from falling in the chimney, sleet, and twigs, among other things. A cap with a screen may also exclude birds and animals from penetrating the area.
Step 6: Final Inspection and Testing
Once construction is complete, perform a thorough inspection:
Look for visible gaps or misaligned masonry joints, such as cracks in the bricks.
Collect the flue liner so that this lining is unbroken and not interrupted.
To test the draft, apply a little flame to the lighted side of the draft and observe the movement of the smoke. The proper draft is that the smoke clears appropriately.
Consult an expert to confirm whether or not the chimney is safe to use.
Tips for Success
It is essential to protect your hands while constructing, so you always wear gloves; your eyes, too, should be protected, so you should wear goggles.
One should especially continue work in dry conditions to allow the mortar to set correctly.
Avoid shortcuts. Chimneys built incorrectly can be hazardous, ranging from causing fire accidents to collapsing at any time.
If you have yet to gain experience with masonry or construction, hire the services of a professional.
Conclusion
Chimney construction must be well planned and correctly done to meet the highest safety standards that need to be observed when constructing it. In the same way, when you have read the above steps, you would have the chimney built in such a way that serves its purpose and complements the physical appearance and worth of your house. It’s perfect for the fireplace and effective for the wood stove; any house benefits from a chimney built effectively.
Also read about: Wardrobe Designs for Bedroom


One Comment on “How To Build Chimney in House”